Draw mountains and waves - complete exercise to join in
Mountains and waves are among the most fascinating motifs you can draw. All the more reason to combine them and capture them in a stylized drawing.
In this blog post, you will learn how to draw a mountain and wave motif with fineliners and markers.
So grab your sketchbook now and let’s get started.

This drawing course is perfect for learning how to draw!
Video course and eBook to help you learn to draw even faster. This course will get you started right away!
Materials required
You only need a few simple materials.
- We create the sketch with a pencil.
- Trace the main lines with a black felt-tip pen.
- We draw the fine details with a fineliner (0.7 mm in the example).
- Finally, you will need markers in orange and blue to breathe life into your artwork.
Step 1: Create a sketch
Start with a box that you draw with light pressure on the pencil. This box will help you to limit the drawing to this area.

Then sketch the waveforms. Make sure that the waves get smaller towards the back. This gives your drawing depth.

Now the mountains come into play. Draw some mountains in the background. They should tower above the waves. Remember to add snow edges on the mountains. These details make the mountains more vivid.

Don’t let yourself get stressed. It’s okay if the sketch isn’t perfect. You can always make adjustments later.
Step 2: Trace the contours with a felt-tip pen
Now comes the exciting part. You pick up the black felt-tip pen. Use it to trace the lines of your sketch. Make sure you only draw right up to the edge of the box.

The waves should be clear and distinct. They are the heart of your drawing. This is followed by the mountains in the background. The lines must be clean and precise. Don’t forget to trace the edges of the snow on the mountains.

You will see how your picture gains depth. The black contours give your drawing structure. It is important that you are patient when doing this. This will make your drawing lively and expressive.
Step 3: Add details with fineliner
Now comes the exciting part. Take the thin fineliner (0.7 mm). Start by tracing the mountain lines. This gives the mountains a natural texture.

Also use the fineliner for the waves. Draw small details, such as whitecaps or wave movements. This gives your drawing more depth and dynamism.
Interrupt the individual lines from time to time. This is what makes the style of the drawing.

Be patient and pay attention to the details. Small strokes can make a big difference. And don’t forget to have fun!
Step 4: Erase sketch lines
Now comes an important step. You need to erase the original pencil sketches. Simply take your eraser and remove all visible pencil lines.
Be careful not to damage the traced lines. This step prepares your drawing for the paint.

Step 5: Add color
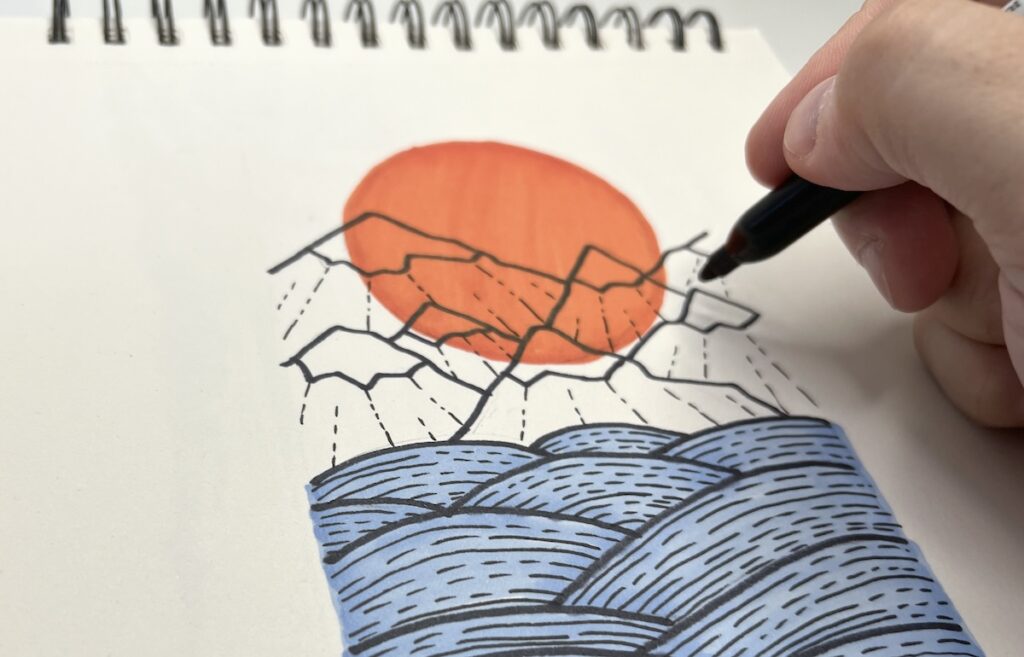
Now comes the fun part: adding color! Take a yellow or orange marker and draw a bright sun in the sky.

The sun brings warmth and life to your drawing.

Color the sun carefully and make sure to keep the edges clean.

Next, choose colors for the waves. You can use a light blue for the water. This will add freshness and movement to your picture. Apply the color evenly and make sure to emphasize the wave shapes.

When you are satisfied, let the colors dry well. This will prevent them from smudging. And voilà, you have created a beautiful landscape with mountains and waves!
Conclusion
You’ve done it! Your drawing is finished. Doesn’t it look great? Now you can be proud of your work of art.
Keep experimenting with colors and motifs. You may want to try different color combinations or add new elements next time.

Now it’s your turn! Try it out for yourself. Let your creativity run wild. Every drawing is unique. Take a look at our other tutorials and online courses!
This drawing course is perfect for learning how to draw!
Video course and eBook to help you learn to draw even faster. This course will get you started right away!