
In this drawing tutorial, I will show you how to draw two fascinating impossible figures. The figures shown here are a little simpler. However, you can draw various other figures directly afterwards.
Drawing tools and materials
We use simple drawing tools to create these drawings. We use a slightly softer pencil (3B) for the sketch. The black contours are drawn with a black felt-tip pen. You will also need an eraser to remove any sketch lines. Here is a short list:
- Drawing paper
- 3B Pencil
- Black felt-tip pen
- Eraser ( kneaded eraser is best)
Draw Impossible Shapes Video Tutorial
This video guides you step by step through these drawing exercises. Every step is shown and explained to you in detail.

Learn to Draw
Faster Than School Allows!
Video course and eBook with which you learn to draw even faster. Knowledge, exercises and video tutorials let you start immediately!
Templates for your Impossible Figures Drawings
Here are some templates for more drawings of impossible figures.

Drawing of the first impossible shape
The first impossible shape is a three-dimensional and twisted triangle. So grab your paper and a pencil and let’s get started.
1. Sketching the basic framework
To draw the first impossible shape, we start with a sketch of a triangle. Draw a simple triangle on your sheet.

Now draw 3 more lines at the same distance on each side.
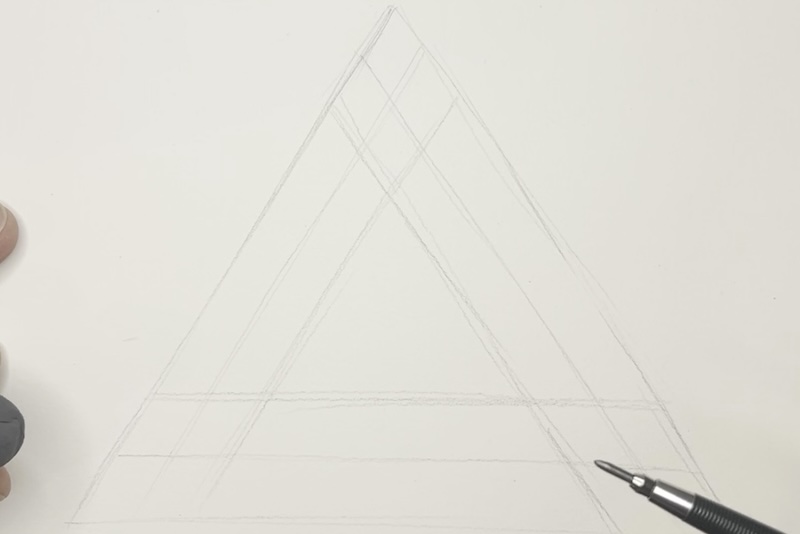
Then draw in the individual corners and erase the unnecessary lines.

Your sketch is now complete.
2. Tracing the figure
Now trace the sketch with a black felt-tip pen.

Then erase your sketch again.
3. Shading
Now take the pencil again and shade the areas of the figure. Use more pressure to make the individual areas darker. And then reduce the pressure to get a nice transition from dark to light.
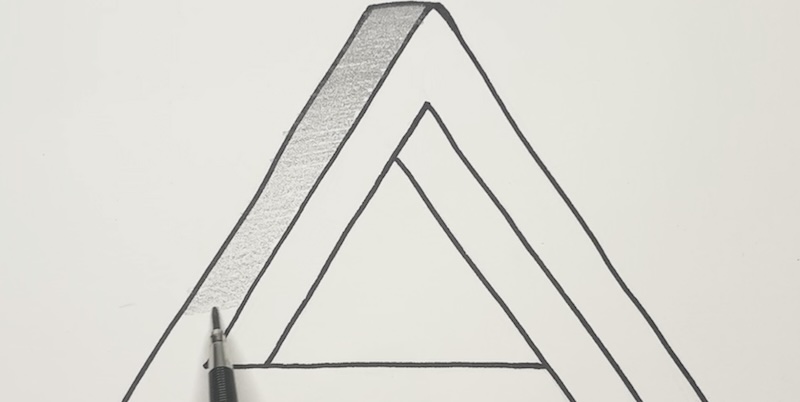
Repeat the process for the individual pages, making sure to draw a dark area next to a light area.

This completes your first impossible shape.

Learn to Draw
Faster Than School Allows!
Video course and eBook with which you learn to draw even faster. Knowledge, exercises and video tutorials let you start immediately!
Drawing of the Second Impossible Shape
The steps for drawing the second impossible shape are the same as for the first.
1. Sketching the basic framework
Draw the sketch of the impossible shape again. First use a cube, which you first sketch in three dimensions.
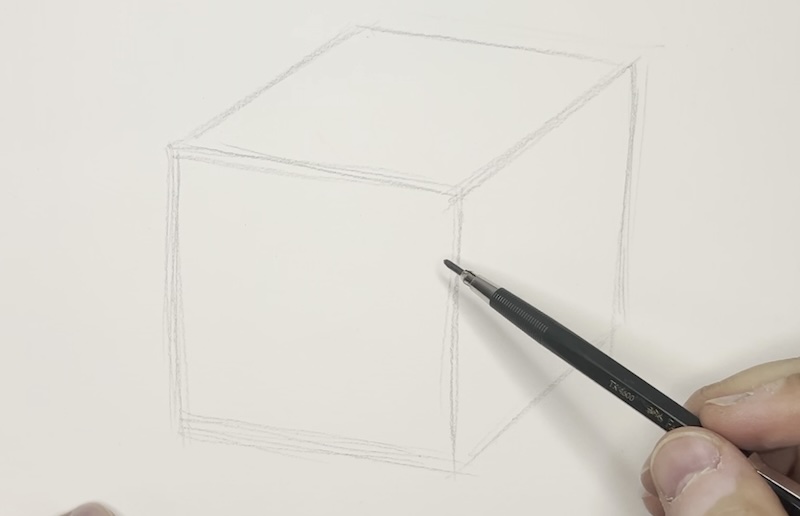
Now draw the holes and then the individual sides of the shape.


Now let the individual sides of the shape overlap so that it becomes impossible.

2. Tracing the figure
Now trace the sketch with a black felt-tip pen.

And then erase your sketch again.
3. Shading
Now pick up the pencil again and let’s shade the individual pages.

Use the same technique as for the previous figure. And your second impossible figure is ready.

Start a learn to draw course now
Here we have a suitable course for you.